Daylilies are often treated as easy fillers, tucked into borders and left to cope on their own. They usually survive, which is part of their appeal, but surviving is not the same as building the dense, flowering clumps most gardeners want. Strong daylily clumps are the result of sound planting, sensible spacing, and a clear understanding of how the plant grows below the soil line. Get those basics right and the reward is a longer-lasting display, cleaner foliage, better repeat performance in some varieties, and far less need for corrective work later.
Specialist growers point out that many weak clumps start with small mistakes made on planting day. Crowns are set too deep, roots are bent into tight holes, plants are squeezed into heavy soil without improvement, or they are placed where neighbouring shrubs take the moisture. In each case the plant may live, but it never develops the strength that gives daylilies their reputation for reliability.
The premier grower of daylily plants SwallowtailDaylilies advises gardeners looking at daylily plants for sale to pay close attention not only to flower colour or height, but also to root quality, planting depth, and final spacing. Their guidance is simple: a well-rooted fan planted into open, workable soil with the crown at the correct level will establish faster and make a stronger clump than a plant dropped into a narrow hole and left to fend for itself.
That practical point matters because daylilies are long-term garden plants. They are not annuals that can be replaced every season. A clump may remain in place for years, gradually increasing in width and flower count. The first planting job therefore sets the pattern for everything that follows. A careful start saves time, reduces losses, and helps the planting look mature much sooner.
How a daylily forms a strong clump
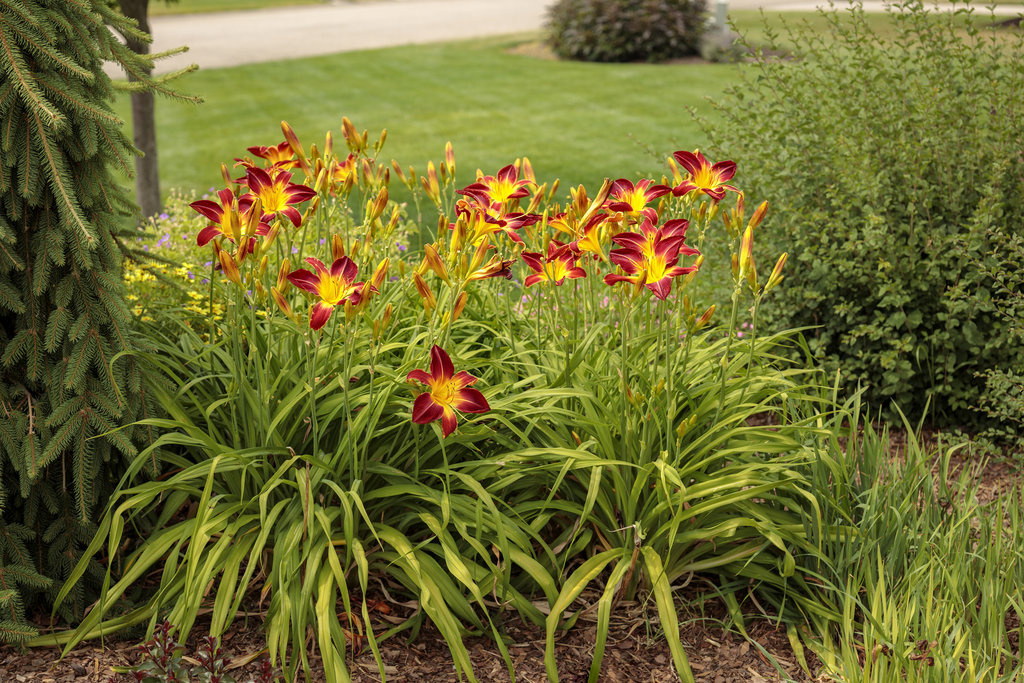
To plant daylilies properly, it helps to understand what a clump actually is. A daylily is made up of fans, each with strap-like leaves rising from a crown and fleshy roots spreading out beneath. Over time, a healthy fan produces more fans. This slow multiplication is what creates the broad, full clump gardeners prize. Flowers improve because the plant has enough energy stored in those thick roots, and the overall effect becomes more substantial from spring into late summer.
A stronger clump is not simply a larger one. It is balanced. The fans are packed closely enough to look full, but not so tightly that air movement is blocked. The roots are able to travel outward rather than circling or hitting compacted ground. The crown sits where warmth, light and oxygen can reach it, while the roots remain in cooler, moisture-retentive soil. Planting needs to support all of those conditions from the outset.
This is why daylilies respond badly to the common habit of digging a neat but shallow hole and stuffing the roots into it. The roots are storage organs and do not appreciate being cramped or sharply bent. They want a broad planting area where they can be spread naturally. A wide hole is usually more useful than a deep one, provided the soil underneath has been loosened enough to prevent a hard pan forming under the crown.
Another point specialists make is that daylilies do not build strength at the same speed in every setting. A variety in free-draining loam may bulk up quickly, while the same variety in sticky clay can take much longer. The plant’s genetic potential still matters, but garden conditions decide how much of that potential is realised. Strong clumps come from matching the plant to a decent position and then removing the physical barriers that prevent root growth.
Gardeners often focus first on the flowers, yet the hidden work happens underground. The broader the root run, the better the plant can draw on moisture during dry spells and the more energy it can store for future flowering. Planting is therefore less about placing a decorative item in a border and more about setting up a durable root system that can support years of growth.
Choosing the right site and preparing the ground properly
Daylilies are adaptable, but adaptability should not be mistaken for indifference. Most perform best in full sun or very light shade, with at least six hours of direct light for good bud formation and sturdy stems. In hotter parts of Britain or in especially exposed gardens, a touch of shade in late afternoon can help some colours hold better, but deep shade usually reduces flowering and encourages lax growth.
The soil should be fertile, open and reasonably moisture retentive while still draining well in winter. That balance is crucial. Daylilies enjoy moisture during active growth, yet crowns sitting in cold wet ground for long periods can weaken or rot. If the soil is heavy, adding organic matter across a broad area before planting is more useful than adding a small pocket of compost to the hole. The latter can create a sump effect where water collects around the roots. A properly prepared bed encourages even drainage and more natural root spread.
Weeds also deserve more attention than they often get. Perennial weeds such as couch grass, bindweed and ground elder are difficult enough in a mixed border. Around a newly planted daylily they quickly become direct competition. Because the plant is trying to establish at the same time, any struggle for water and nutrients slows down clump formation. Clearing the site thoroughly before planting is not glamorous work, but it often has more effect on long-term success than a bag of feed applied later.
Spacing is another part of site choice. Daylilies may look modest when newly planted, especially if bought as single fans, but they are not tiny plants for long. Positioning them too close to roses, hydrangeas, or evergreen shrubs leads to hidden root competition and restricted airflow. A border may look satisfyingly full in the first season, yet by the third or fourth year the daylily can be crowded from all sides and the clump never reaches its natural shape.
A simple test is to imagine the plant at double or triple its current width. If there is no room for that expansion, the site is too tight. Good spacing also makes maintenance easier. Dead foliage can be removed cleanly, spent stems are easier to cut out, and dividing the clump later is not a battle with neighbouring plants. Stronger clumps are often the product of restraint: giving the plant enough room at the start instead of cramming every space in the border.
How to plant daylilies step by step for lasting results
The best planting seasons are spring and early autumn, when soil conditions are workable and roots can establish without the stress of peak heat or hard winter cold. Container-grown daylilies can be planted more widely through the growing season if watered carefully, but freshly divided or bare-root plants benefit from milder conditions and steady moisture.
Begin by soaking bare-root plants for a short time if the roots seem dry from transit, but do not leave them sitting in water for hours on end. Prepare a generous hole wider than the spread of the roots. In the middle, create a small mound of soil and arrange the roots over it so they fall outward rather than bunching together. This is one of the key details specialists return to again and again because it dictates how quickly the plant settles.
The crown should sit only just below the soil surface, usually around 2 to 3 centimetres deep in most garden situations. Planting much deeper is a common cause of poor performance. Deeply buried crowns often produce weak growth and reduced flowering because the plant expends energy pushing upward instead of establishing efficiently. In lighter soils, the crown may settle slightly after watering, so account for that when setting the final level.
Backfill with the improved soil, firming gently so there are no large air pockets around the roots. Then water thoroughly. This first watering is not a token gesture. It settles the soil around the roots and helps reveal whether the crown has sunk too low. If it has, lift and adjust it immediately. It is far easier to correct planting depth on the day than after several weeks of growth.
After planting, apply a light mulch around the plant, keeping it clear of the crown itself. Mulch helps conserve moisture, moderates soil temperature and suppresses fresh weed growth, but piling it over the crown can hold too much damp against the base of the plant. A neat ring around the root zone is enough.
For spacing, many garden varieties do well with roughly 45 to 60 centimetres between plants, though larger cultivars may need more. That can seem excessive at planting time, especially when the border looks sparse, but the space is what allows the clump to become stronger rather than congested. The aim is not instant fullness. The aim is a plant that can bulk up steadily, flower freely and remain attractive for several years before division is needed.
The aftercare that turns a planted fan into a substantial clump
Planting is the first job, not the only one. The weeks after planting determine whether the daylily settles into active growth or stalls. Watering is the most important part of aftercare, particularly in the first growing season. The soil should remain evenly moist but never sodden. That means deep, occasional watering is usually better than light daily sprinkling, which encourages shallow rooting and does little to build resilience.
Feeding should be measured rather than heavy-handed. Daylilies are not gross feeders, and an excess of high-nitrogen fertiliser can produce lush leaves at the expense of flowers. A balanced feed in spring, combined with soil improved by organic matter, is generally enough for healthy establishment. On poor soils, a second light feed after the main flush of bloom may help replenish the plant, but the goal is steady growth, not forced softness.
Deadheading also plays a role. Removing spent flowers keeps the clump tidier and can improve appearance considerably, but cutting off finished scapes once flowering is over is just as useful. It redirects attention to leaf and root growth. Clean foliage matters because it powers the plant. A clump with plenty of healthy green leaf is storing energy for future flowering and for the production of new fans.
Weed control remains important during establishment. A strong daylily clump eventually competes well on its own, but it does not begin that way. Keeping the area around the crown clear prevents stress and allows air and light to reach the base of the plant. This is especially useful in wetter summers when congestion can lead to tired-looking foliage.
It also helps to be patient. Gardeners sometimes expect a newly planted daylily to look fully settled within weeks. Some do, but many spend their first season rooting in rather than putting on a major display. That is not failure. It is preparation. By the second or third season, the difference between a hastily planted fan and a properly planted one becomes obvious. The stronger clump carries more stems, holds itself better in the border, and recovers more quickly from dry weather or brief neglect.
The temptation to keep moving plants should be resisted as well. Daylilies appreciate time in one place. Repeated lifting and shifting interrupts the process of clump building. Unless a plant is clearly in the wrong location, leave it to settle and judge performance over more than one season.
Common mistakes, dividing mature clumps, and getting more from the planting
Several recurring mistakes prevent daylilies from forming the robust clumps people expect. The first is over-deep planting, which remains one of the most widespread problems. The second is poor spacing. The third is putting plants into ground that has not been properly prepared, especially compacted clay or very dry, root-filled borders. Each issue limits root development, and root limitation always shows above ground in weaker stems, fewer flowers and a thinner overall look.
Another mistake is assuming every decline in flowering means the plant needs feeding. Sometimes the real problem is congestion. Mature clumps can become tight in the centre after several years, especially if growth has been strong. When flowering drops or the middle looks tired, division may be the right answer. In Britain, this is usually done in spring or early autumn. Lift the clump carefully, wash or shake off excess soil if needed, and separate it into healthy sections with fans and roots attached. Replant the strongest pieces using the same method as for a new plant, paying close attention again to crown depth and spacing.
Division is not only a way to rescue an overgrown plant. It is also how gardeners can improve rhythm and repetition through the border. A single successful clump can become several over time, and because those divisions come from a plant already proven in the garden, they often adapt quickly once replanted. This is one reason many experienced growers inspect root systems carefully when choosing daylily plants for sale. A well-grown starting plant is effectively the beginning of many future clumps if handled properly.
Weather should also shape expectations. A newly planted daylily going into a dry late spring will need more support than one planted into moist autumn ground. Likewise, a cold, waterlogged winter can slow progress even when planting was technically correct. Strong clumps are built by good practice, but they still develop in real weather, not laboratory conditions. The sensible response is to adjust watering, mulching and timing rather than assume the plant itself is at fault.
In the end, the method is straightforward. Give the plant sun, open fertile soil, enough room, the right planting depth, and steady aftercare during establishment. Those are not complicated techniques, but they are the difference between a daylily that merely survives and one that becomes a dependable, substantial clump. When specialists talk about stronger clumps, they are not describing a secret trick. They are describing the cumulative effect of doing the ordinary jobs properly, from the first hole dug to the moment the plant is mature enough to divide and start the cycle again.