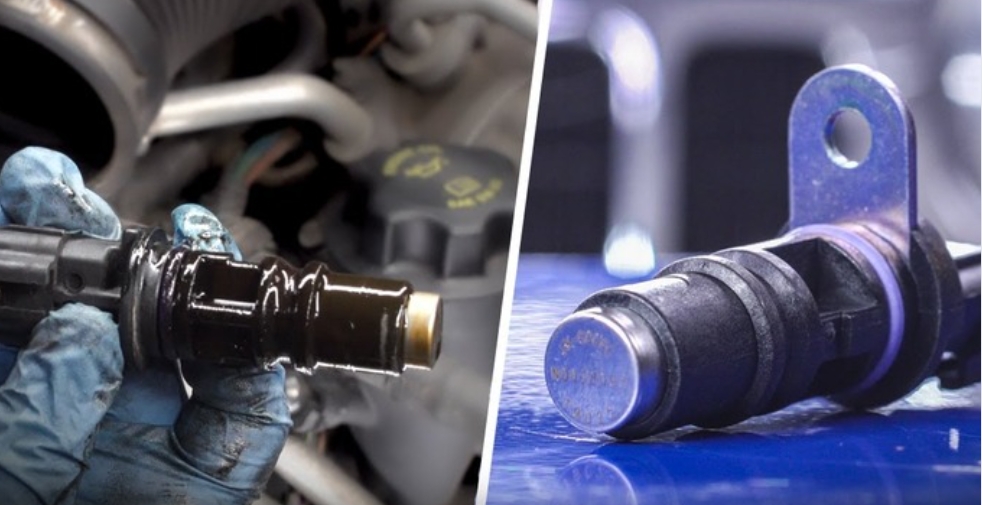
The camshaft position sensor (commonly referred to as the cam sensor) plays a critical role in your vehicle’s engine management system. It monitors the position of the camshaft and communicates this data to the engine control unit (ECU). This helps the ECU adjust fuel injection timing and ignition, ensuring optimal engine performance. When the cam sensor fails, you may experience rough idling, misfires, reduced fuel efficiency, or even difficulty starting the engine.
Replacing a faulty cam sensor is a relatively straightforward task that can be done with basic tools. In this guide, we’ll walk you through the steps to replace a cam sensor and restore your vehicle’s performance.
Symptoms of a Failing Cam Sensor
Common Signs Your Cam Sensor Needs Replacement
Before you begin the replacement process, it’s important to recognize the signs of a failing cam sensor. Some common symptoms include:
- Check Engine Light: One of the most common indicators of a faulty cam sensor is the Check Engine Light turning on. A diagnostic scan tool can help you identify whether the cam sensor is causing the problem by reading the trouble codes stored in the ECU.
- Engine Misfires: The cam sensor helps the ECU time the spark and fuel injection. When it malfunctions, this timing can be thrown off, leading to misfires.
- Poor Acceleration: A bad cam sensor may cause inconsistent power delivery, resulting in poor acceleration or reduced engine performance.
- Difficulty Starting the Engine: The engine may struggle to start or not start at all if the cam sensor is providing incorrect data to the ECU.
- Rough Idling: A failing cam sensor can also cause the engine to idle roughly due to improper fuel and air mixture timing.
If you notice any of these symptoms, it’s a good idea to check the cam sensor and replace it if necessary.
Tools and Materials Needed
Before starting the cam sensor replacement, gather the following tools and materials:
- New camshaft position sensor (specific to your vehicle’s make and model)
- Socket wrench set (with appropriate socket sizes, typically 8mm or 10mm)
- Torx bit set (for vehicles that use Torx screws)
- Screwdriver (flathead or Phillips, as needed)
- Work gloves (to protect your hands)
- Shop towels or rags (to clean up any spills or debris)
With these tools in hand, you’re ready to begin the process of replacing the cam sensor.
Step-by-Step Guide to Replacing a Cam Sensor
Step 1: Ensure Safety and Disconnect the Battery
Before starting any electrical work on your vehicle, it’s important to ensure your safety by disconnecting the battery.
- Turn off the engine: Make sure the engine is completely turned off.
- Disconnect the negative battery terminal: Use a wrench to disconnect the negative terminal of the battery to prevent any accidental shorts or electrical issues while working on the sensor.
Step 2: Locate the Camshaft Position Sensor
The camshaft position sensor is typically located near the top of the engine, either on or near the camshaft. The exact location of the sensor will vary depending on your vehicle’s make and model, but it is often found:
- Near the valve cover
- Around the timing chain or belt area
- Attached to the engine block near the camshaft
Check your vehicle’s owner’s manual or a repair guide for the exact location if you’re unsure.
Step 3: Remove Any Obstructions
In some vehicles, other components like plastic engine covers, hoses, or brackets may obstruct access to the cam sensor.
- Remove the engine cover (if necessary): If there’s an engine cover in the way, use a socket wrench to remove the screws or bolts holding it in place.
- Move hoses or wiring: If hoses or wires are obstructing the cam sensor, gently move them aside to create better access.
Step 4: Disconnect the Electrical Connector
Once you’ve located the cam sensor, you’ll need to disconnect the electrical connector attached to it.
- Press the release tab on the electrical connector and carefully pull it away from the sensor.
- Make sure to handle the connector carefully to avoid damaging the wiring or connector housing.
Step 5: Remove the Cam Sensor
With the electrical connector removed, you can now take out the old cam sensor.
- Use a socket wrench or Torx bit (if applicable) to remove the bolts securing the sensor to the engine. Most sensors are held in place with one or two bolts.
- Gently pull the sensor out: Once the bolts are removed, carefully pull the sensor out of its housing. If it’s stuck, gently twist it back and forth to free it.
Step 6: Install the New Cam Sensor
Now that the old sensor is removed, you can install the new camshaft position sensor.
- Position the new sensor in the same spot where the old one was removed, ensuring it fits snugly into place.
- Secure the sensor with the bolts you removed earlier, using a socket wrench or Torx bit to tighten them. Be careful not to overtighten, as this could damage the sensor or mounting area.
Step 7: Reconnect the Electrical Connector
With the new sensor installed, you can now reconnect the electrical connector.
- Plug the connector back into the new sensor, ensuring it clicks into place securely.
Step 8: Reinstall Any Obstructions
If you had to remove any engine covers, hoses, or other components, now is the time to reinstall them.
- Replace the engine cover: If you removed the engine cover earlier, reinstall it by securing the bolts or screws with a socket wrench.
- Ensure any hoses or wiring are properly routed and secured in their original positions.
Step 9: Reconnect the Battery and Test the Engine
Once everything is reassembled, you can reconnect the battery and test the engine to ensure the new cam sensor is functioning properly.
- Reconnect the negative battery terminal to restore power to the vehicle.
- Start the engine: Turn the ignition key to start the engine. Check for any warning lights on the dashboard and listen for smooth engine operation.
- If the engine starts smoothly and there are no warning lights, the replacement was successful.
Step 10: Test Drive the Vehicle
After replacing the cam sensor, take your vehicle for a short test drive to ensure that the engine is running smoothly and that all previous symptoms (misfires, poor acceleration, etc.) have been resolved.
Conclusion
Replacing a faulty camshaft position sensor is a relatively simple DIY task that can restore your vehicle’s performance and eliminate issues like misfires, poor acceleration, and rough idling. By following this step-by-step guide, you can easily replace the cam sensor yourself, saving time and money on repairs. Regular maintenance of critical sensors like the camshaft position sensor ensures that your vehicle runs smoothly and efficiently for years to come.