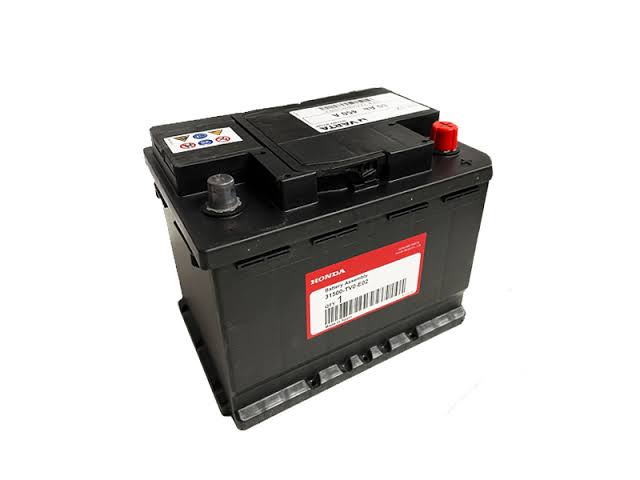
Powering Performance: Unveiling the Battery of the Honda Civic 2016
In the world of compact cars, the Honda Civic has long been celebrated for its reliability, efficiency, and innovative features. At the heart of its electrical system lies a critical component: the battery. In this blog, we’ll delve into everything you need to know about the battery in the 2016 Honda Civic, including its function, types, maintenance tips, common issues, and replacement guidelines, to ensure your Civic remains powered up and ready for the road.
Understanding the Battery in the 2016 Honda Civic
Function:
The battery in the 2016 Honda Civic serves as the primary power source for starting the engine and providing electrical energy to various components, including lights, audio systems, and accessories, when the engine is not running. It stores electrical energy generated by the alternator during operation to ensure reliable starting and operation of the vehicle.
Components:
The battery consists of a plastic case housing lead plates submerged in an electrolyte solution of sulfuric acid and water. When the battery is charged, a chemical reaction occurs between the lead plates and electrolyte, producing electrical energy that is stored and released as needed.
Types of Batteries
Lead-Acid Batteries:
Lead-acid batteries are the most common type found in vehicles, including the 2016 Honda Civic. They are affordable, reliable, and capable of delivering sufficient cranking power to start the engine in various weather conditions.
Absorbent Glass Mat (AGM) Batteries:
AGM batteries are a more advanced type of lead-acid battery, featuring absorbent glass mat separators that hold the electrolyte in place between the lead plates. They offer improved performance, durability, and resistance to vibration compared to traditional lead-acid batteries.
Common Issues with Batteries
Battery Drain:
Battery drain can occur due to prolonged periods of inactivity, parasitic electrical loads, or faulty components such as lights or accessories left on. This can result in a dead battery and difficulty starting the engine.
Corrosion:
Corrosion on the battery terminals and cable connections can interfere with electrical conductivity and lead to poor starting and charging performance. Regular cleaning and maintenance are essential to prevent corrosion buildup.
Aging:
As batteries age, their ability to hold a charge and deliver sufficient cranking power diminishes. This can result in slow cranking, difficulty starting the engine, and ultimately, complete battery failure.
Maintenance Tips for Batteries
Regular Inspections:
Inspect the battery and its terminals regularly for signs of corrosion, damage, or leaks. Look for bulging or swelling of the battery case, which may indicate internal damage or electrolyte leakage.
Cleaning:
Clean the battery terminals and cable connections with a mixture of baking soda and water to remove corrosion and ensure good electrical contact. Use a wire brush or battery terminal cleaner to scrub away any buildup.
Testing:
Test the battery voltage and charging system regularly using a multimeter or battery tester to ensure proper operation and performance. A fully charged battery should have a voltage reading of around 12.6 volts.
Replacement Guidelines for Batteries
Signs for Replacement:
Replace the battery in your 2016 Honda Civic if you notice any of the following signs:
- Difficulty starting the engine or slow cranking
- Frequent jump-starts or need for battery boosters
- Corrosion or damage to the battery case or terminals
- Age of the battery approaching or exceeding its expected lifespan (typically 3-5 years)
Replacement Procedure:
- Disconnect the Battery: Start by disconnecting the negative (black) terminal first, followed by the positive (red) terminal. Use a wrench or battery terminal puller to loosen the terminal clamps and remove them from the battery posts.
- Remove the Old Battery: Loosen the battery hold-down clamp or bracket and remove it from the battery tray. Carefully lift the old battery out of the tray and set it aside for recycling.
- Install the New Battery: Place the new battery into the battery tray, ensuring it is positioned securely and level. Reinstall the battery hold-down clamp or bracket to secure the battery in place.
- Connect the Terminals: Reconnect the positive (red) terminal first, followed by the negative (black) terminal. Tighten the terminal clamps securely to ensure good electrical contact.
- Test the Battery: Turn the ignition key to the “on” position and check for proper operation of lights, accessories, and other electrical components. Start the engine and verify that it starts smoothly and without hesitation.
Conclusion
The battery in the 2016 Honda Civic is a vital component of its electrical system, providing the power needed to start the engine and operate various electrical components. By understanding its function, recognizing common issues, following proper maintenance guidelines, and knowing when to replace it, you can ensure that your Civic remains powered up and ready for the road. Regular inspections, cleaning, testing, and timely replacement of worn or faulty batteries are key to maintaining reliable starting and electrical performance and enjoying the full benefits of your Honda Civic’s electrical system.


Post Comment